How to start
This tutorial is supposed to give an introduction into scripting in mIRC. It will explain the so-called Scripts-Editor and its functions, followed by a little example. At the end it will give some hints about how to debug a script.
The Remote Editor
If you want to begin to script in mIRC, you need to open the Script-Editor. You can do it in two ways: pressing "Alt + R" or with mIRC's menubar (Tools -> Scripts Editor).
If you are using a premade script (for example nnscript), you will probably see a lot of code. Note that it is difficult to implement own scripts in such a premade one, as your code may interfere with the existing code (if you want to change mIRC's default output for example).
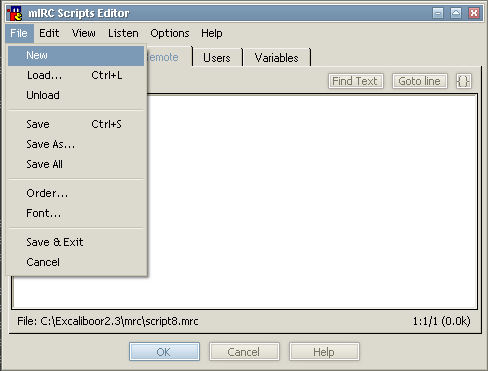
At first, you should open a new remote file. To do it, click on File -> New (see picture below).
Note that your script files will be saved once you press "Ok"
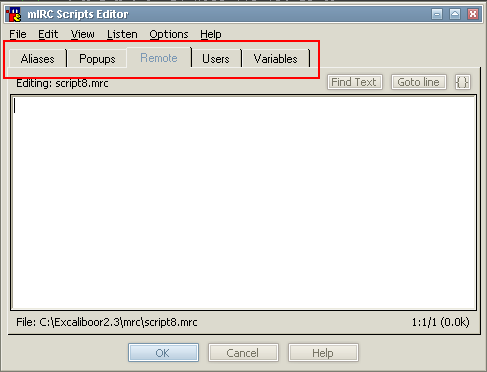
The next part is about the five different tabs of mIRC's Scripts Editor:
Aliases-Tab
Basically, you do not need to use aliases.ini (that you can edit using this tab). Usually, if you want to add a new alias, it would look like:
alias moo { return moo }
in your 'Remote-Section' of the editor (the one that's active after pressing Alt + R).
You can add the same alias in your Aliases-Section:
moo { return moo }
Notice that you don't need to write 'alias' infront of the new alias if it's in the Aliases section and note that you cannot add events in this section.
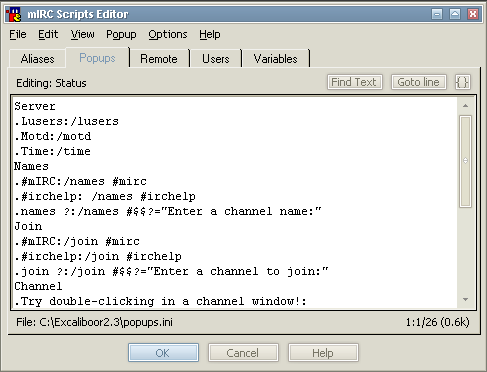
Popups-Tab
Again you do not need to use this section. It's the same as using the menus alias in the remote section. Usually, there will be some menus added in this section (for example your nicklist-menu).
Remote-Tab
This is the "maintab". Every script is supposed to be saved in here.
Note that you should not have two same events in one file, as only the first matching one will be triggered. Two separate examples:
; will be triggered
on *:Text:*:*: { echo moo }

; will never be triggered
on 10:Text:*:*: { echo maa }
; will be triggered for level 10
on 10:Text:*:*: { echo maa }

; will be triggered for all but level 10
on *:Text:*:*: { echo moo }
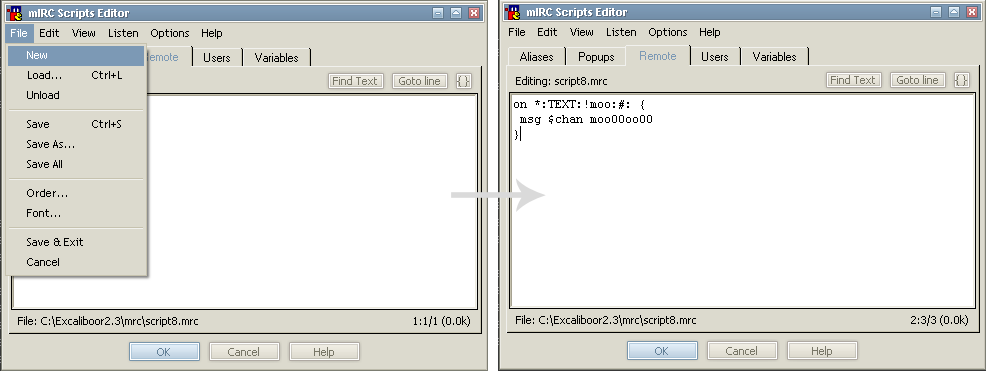
So if you aren't sure whether it will work or not, just use another (a new) file (look the image below to see how to make a new file).
The following script will trigger on every "!moo" in every channel and response with "moo00oo00":
on *:TEXT:!moo:#: {
 msg $chan moo00oo00
}
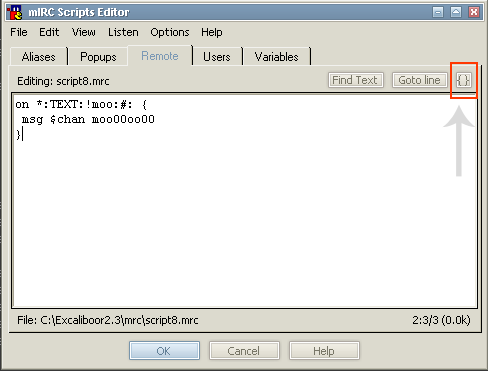
This would look like:
If you are scripting something more complex, you want to use the check-mark button (or "{}"-button in older mIRC versions) in the upper right corner (see below). That button is used to check for bracket mis-matches in the scriptfile.
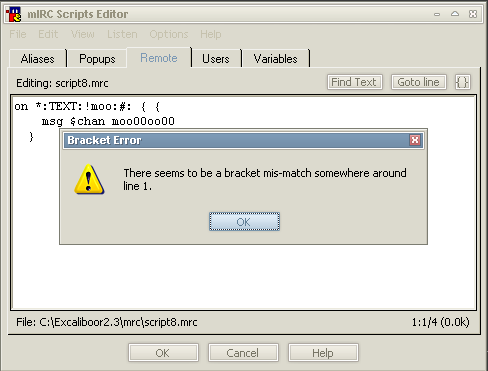
If you've pressed it and nothing happended, everything is ok (note that it doesn't mean that your scripts will work, just that there are no obvious bracket mistakes (mIRC just counts the open and closed brackets)). If something's wrong, you will get the following popup:
Even if it says that the bracket error is around line 1, it could be almost anywhere. Start you search from that line and look at the indentations to find out where you're missing a bracket.
The remote tab contains scripts that are triggered by events, such as when someone speaks or when someone joins a channel. For example, the following 'remote script' would tell user's who join a channel hello!
 on *:JOIN:#: {
   msg $nick Hello. Welcome to $chan $+ !!!
 }
If you would like to learn scripting, you should familiarize yourself with this tab. You should also learn event names and understand how to run commands, such as the msg command above which messages a channel or nick name. You should also learn what identifiers are and how to use them. An example of an identifier in the above script is $nick and $chan which tell us the user's nick name and the channel's name. You may click on any blue hyperlink for more information about a a command or identifier that you see in any of this wiki's examples. Please use the examples and test them, to try and understand what they do. Keep in mind, mIRC is a high level language and almost everything sounds like it is. For example, if you want to know when someone quites you would use the on quit event! One of the most common script events used is the on text event, which triggers when someone speaks either in a channel or a private message. If you are interested in these events, you should move on to part 2 of this introduction.
Users-Tab
In this file your userlist is saved. You don't need to edit it manually, as there are commands to do it. See access levels in general, auser, guser and ruser.
Variables-Tab
All your global variables are saved in here. Again, you don't need to edit it manually, as you can use set, unset or unsetall.
How to debug
After you've written some lines and you've tested it, you will most likely notice, that it doesn't do what you expect it to do. The next step is to debug your script. At first take a look at your Status Window and check for error messages. If there are any, search for these errors in your script and correct them. If they aren't any, you should add echo's in your script to see where it stops to work. For example:
on *:TEXT:*:*: {
 if (%moo) { echo -a we are here }
 elseif (%moo2) { echo -a we are here 2 }
 echo -a after the if clauses
}
With this method, you can see exactly where it stops to work and correct this part.
Note You cannot trigger on text, on notice, on action... events by yourself, you will need someone's help or another client or multiserver (/server -m ...) to test them.
If some of the built-in commands don't work, ie. /kick, /away ... etc. you might have a custom alias that overrides them, you can test it with /!command, ie. /!kick #channel nick. /!command will use the default mIRC command and bypass any custom aliases.
For more info on debugging, see Debugging (Find The Bug).
